How to install the accessibility widget in Joomla

Step 1: Install the module
Download the free module from the DockWCAG website – assistforwcag.zip.
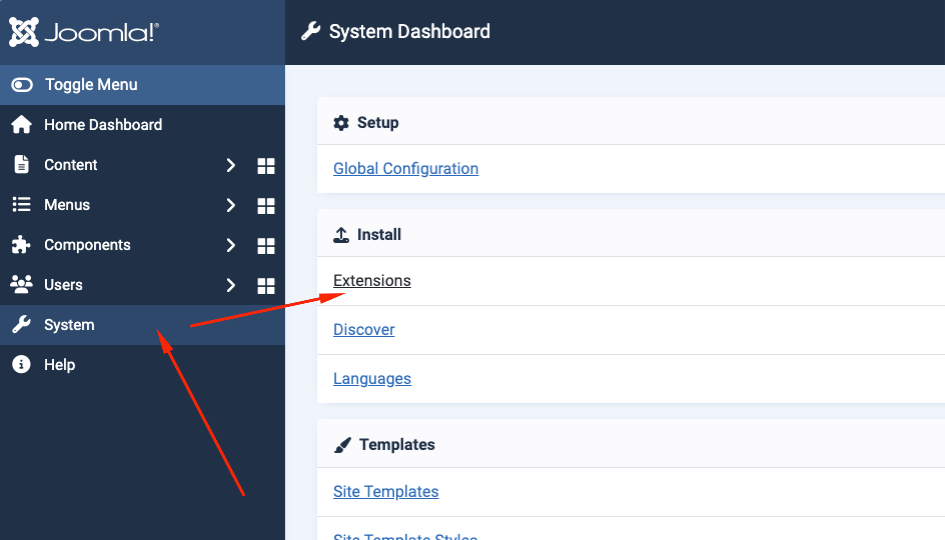
In the Joomla admin panel, go to the “System” tab in the left menu, then click “Extensions”.
 When you get to the extension installer, at the top of the page, click “Upload Package File” and then drag and drop or select from disk the previously downloaded .zip file with the module.
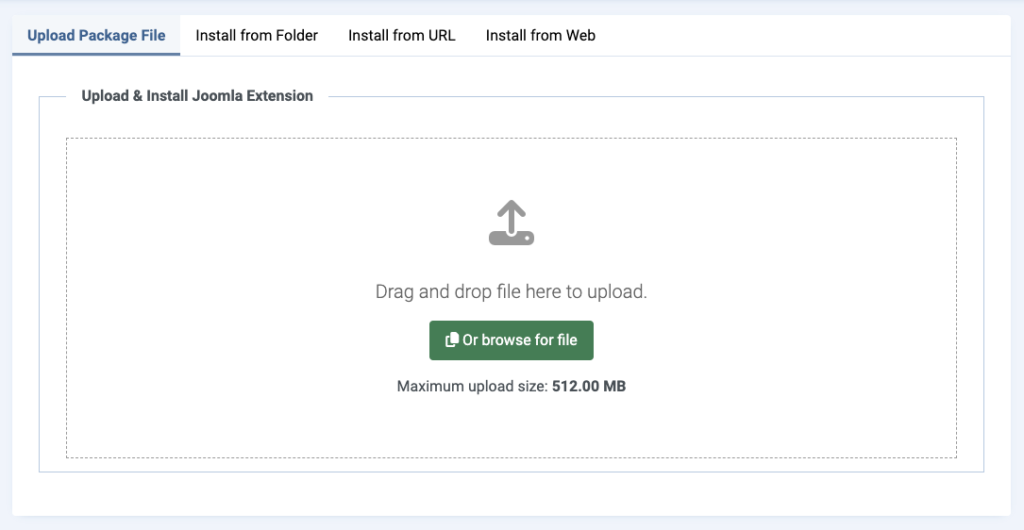 The installation will start automatically.
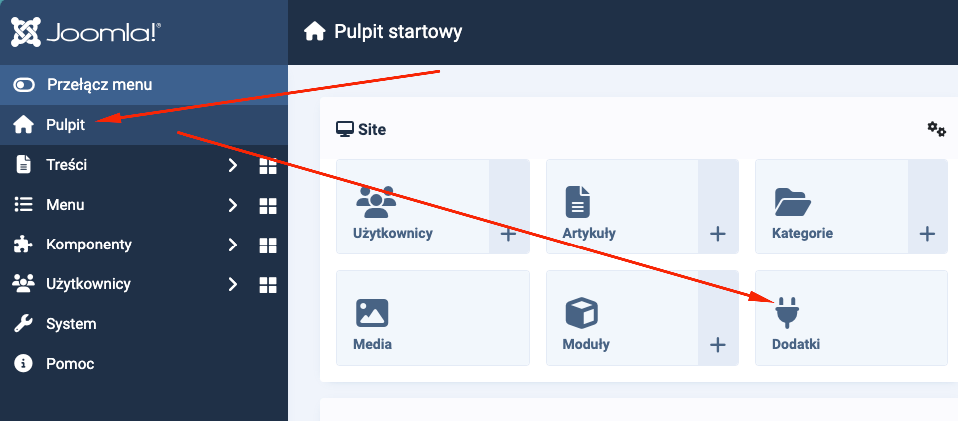
Once installed, go to the “Desktop” tab, and then click “Plugins“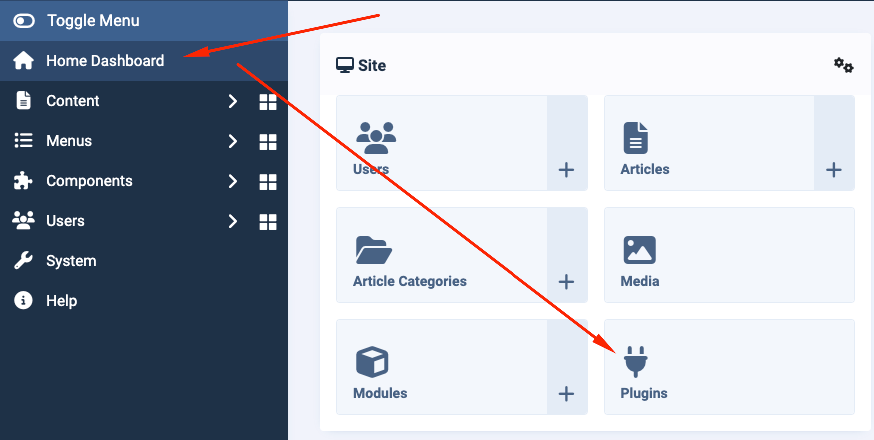
In the add-ons tab, look for a module named “AssistForWCAG” and go to configure it.

Step 2: Register your site and obtain a token
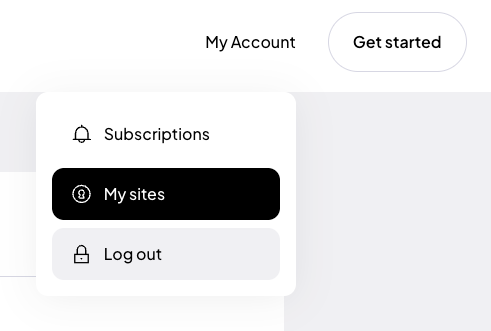
If you are installing the plugin for the first time, register using Google, Facebook or use your own email address and password.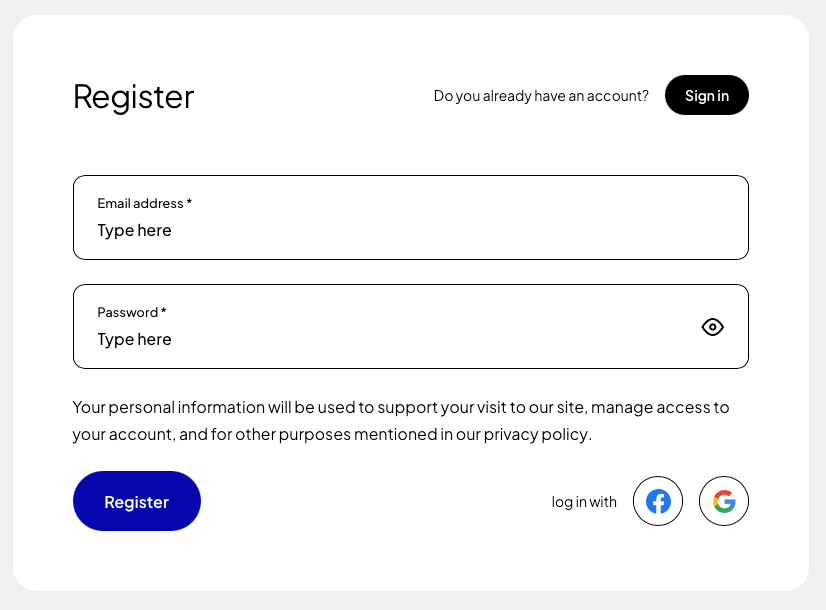 After creating an account, go to the “My Sites” tab, and then click the button “Add new”.
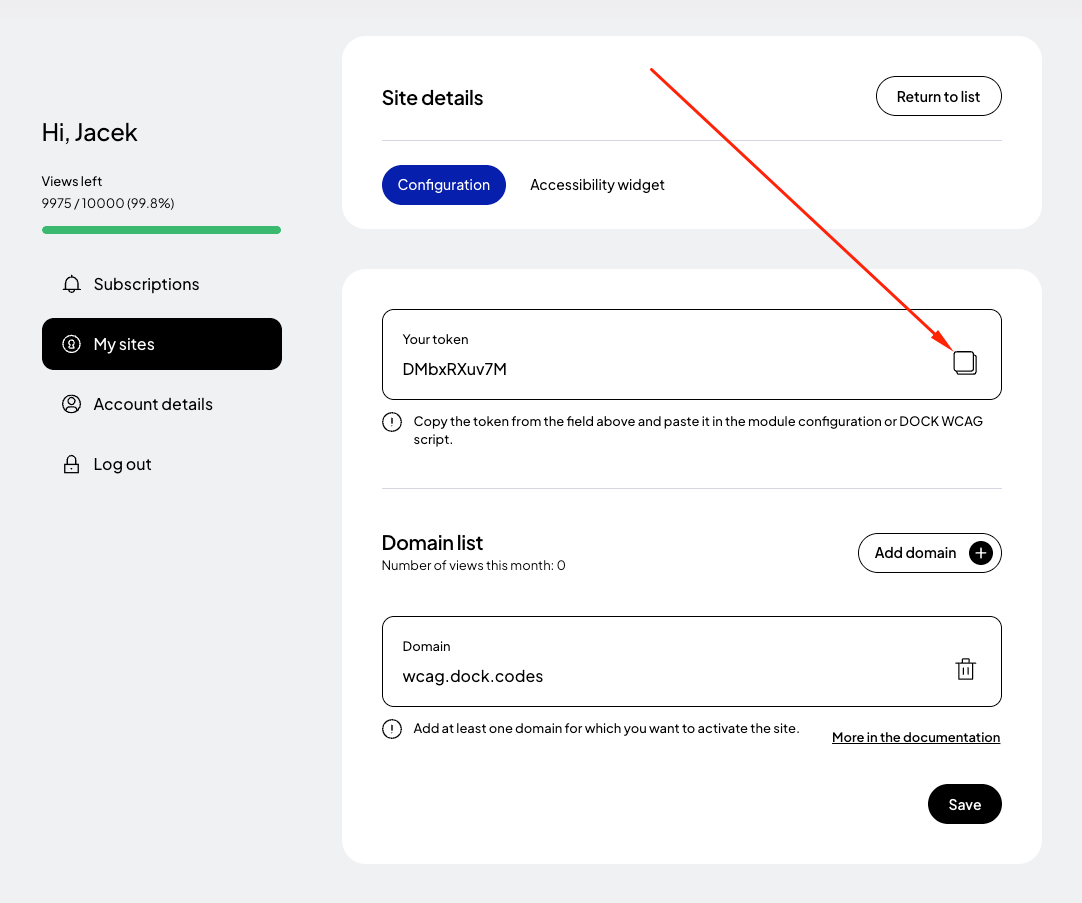
 In the form for adding a new page, enter the addresses of the websites where you want to apply the token. If your site runs on a domain such as example .com and e.g. www. example.com then it is necessary to add both addresses. Read more about this in the documentation.
Finally, click the "Save" button and copy the generated token.
In the form for adding a new page, enter the addresses of the websites where you want to apply the token. If your site runs on a domain such as example .com and e.g. www. example.com then it is necessary to add both addresses. Read more about this in the documentation.
Finally, click the "Save" button and copy the generated token.
Step 3: Activate the accessibility widget
Once you have the token, go back to your Joomla panel, go to the plugin’s configuration section and paste the copied token in the appropriate field. Remember to save your changes when you are done with the configuration.
Step 4: Preview the site
After installation and configuration, test the widget on your site to make sure it works properly and is WCAG compliant.